

SITCOMTN-155
Eyepiece Observations with the Auxiliary Telescope#
Abstract
This Technote serves as a guide for performing eyepiece-based observations with the Auxiliary Telescope.
Introduction#
Note
Eyepiece observations with the Auxiliary Telescope (AuxTel) require prior approval from one of the following Summit Leadership: Kevin Reil, Sandrine Thomas or Roberto Tighe.
Warning
Mandatory Personal Protective Equipment (PPE) required during eyepiece-based observations:
Safety boots.
Hard hat.
High-visibility vest or jacket.
Cold weather gear.
Flashlight.
Red flashlight.
Danger
This mode of observing with AuxTel requires personnel to be on the telescope floor while the telescope and dome are moving. The safety door interlock will have to be overridden. Extreme caution is advised at all times.
Collision hazard with the telescope structure, dome, and telescope floor tables and equipment. Please maintain a safe distance from the telescope mount.
Fall hazard on the telescope floor. Please be aware of your surroundings while walking on the second floor of the telescope building, especially during nighttime.
Entrapment hazard with the telescope structure and dome. Please maintain a safe distance from the telescope mount and from the mount.
Electrical hazard with the dome slip-ring. Please maintain a safe distance from the dome.
Note
Two staff members are needed to perform this procedure (visitors do not count).
Note
During nighttime, all building lights in AuxTel must remain off once the shutter is open. Please use flashlights (preferably red) with caution to avoid light pollution affecting other observatories on the summit.
Procedure - Starting Observations#
Prior authorization for AuxTel eyepiece observations from Kevin Reil, Sandrine Thomas or Roberto Tighe is mandatory.
Ensure the mandatory PPE is worn before entering the AuxTel building.
Post a message in the Slack channels summit-auxtel and summit-announce communicating that you are about to start eyepiece-based observations with AuxTel. Additionally, inform the Observing Specialist (OS) on-duty about this.
Confirm with the OS on-duty that all ATMCS and LATISS CSCs are in STANDBY. This will ensure no remote operations can be performed and that the ATMCS CSC does not go into a fault mode when re-positioning the M3.
Inside the AuxTel building, go to the Safety Gate, and press the Release button. A click sound will be heard, releasing the mechanism that allows the door to be opened. Be aware that opening the Safety Gate will trigger the interlock, disabling all telescope and dome movement. For additional information, you can find the Safety Gate Procedure at this link:
https://obs-ops.lsst.io/Safety/Safety-Systems/Safety-Gate-Procedures.html
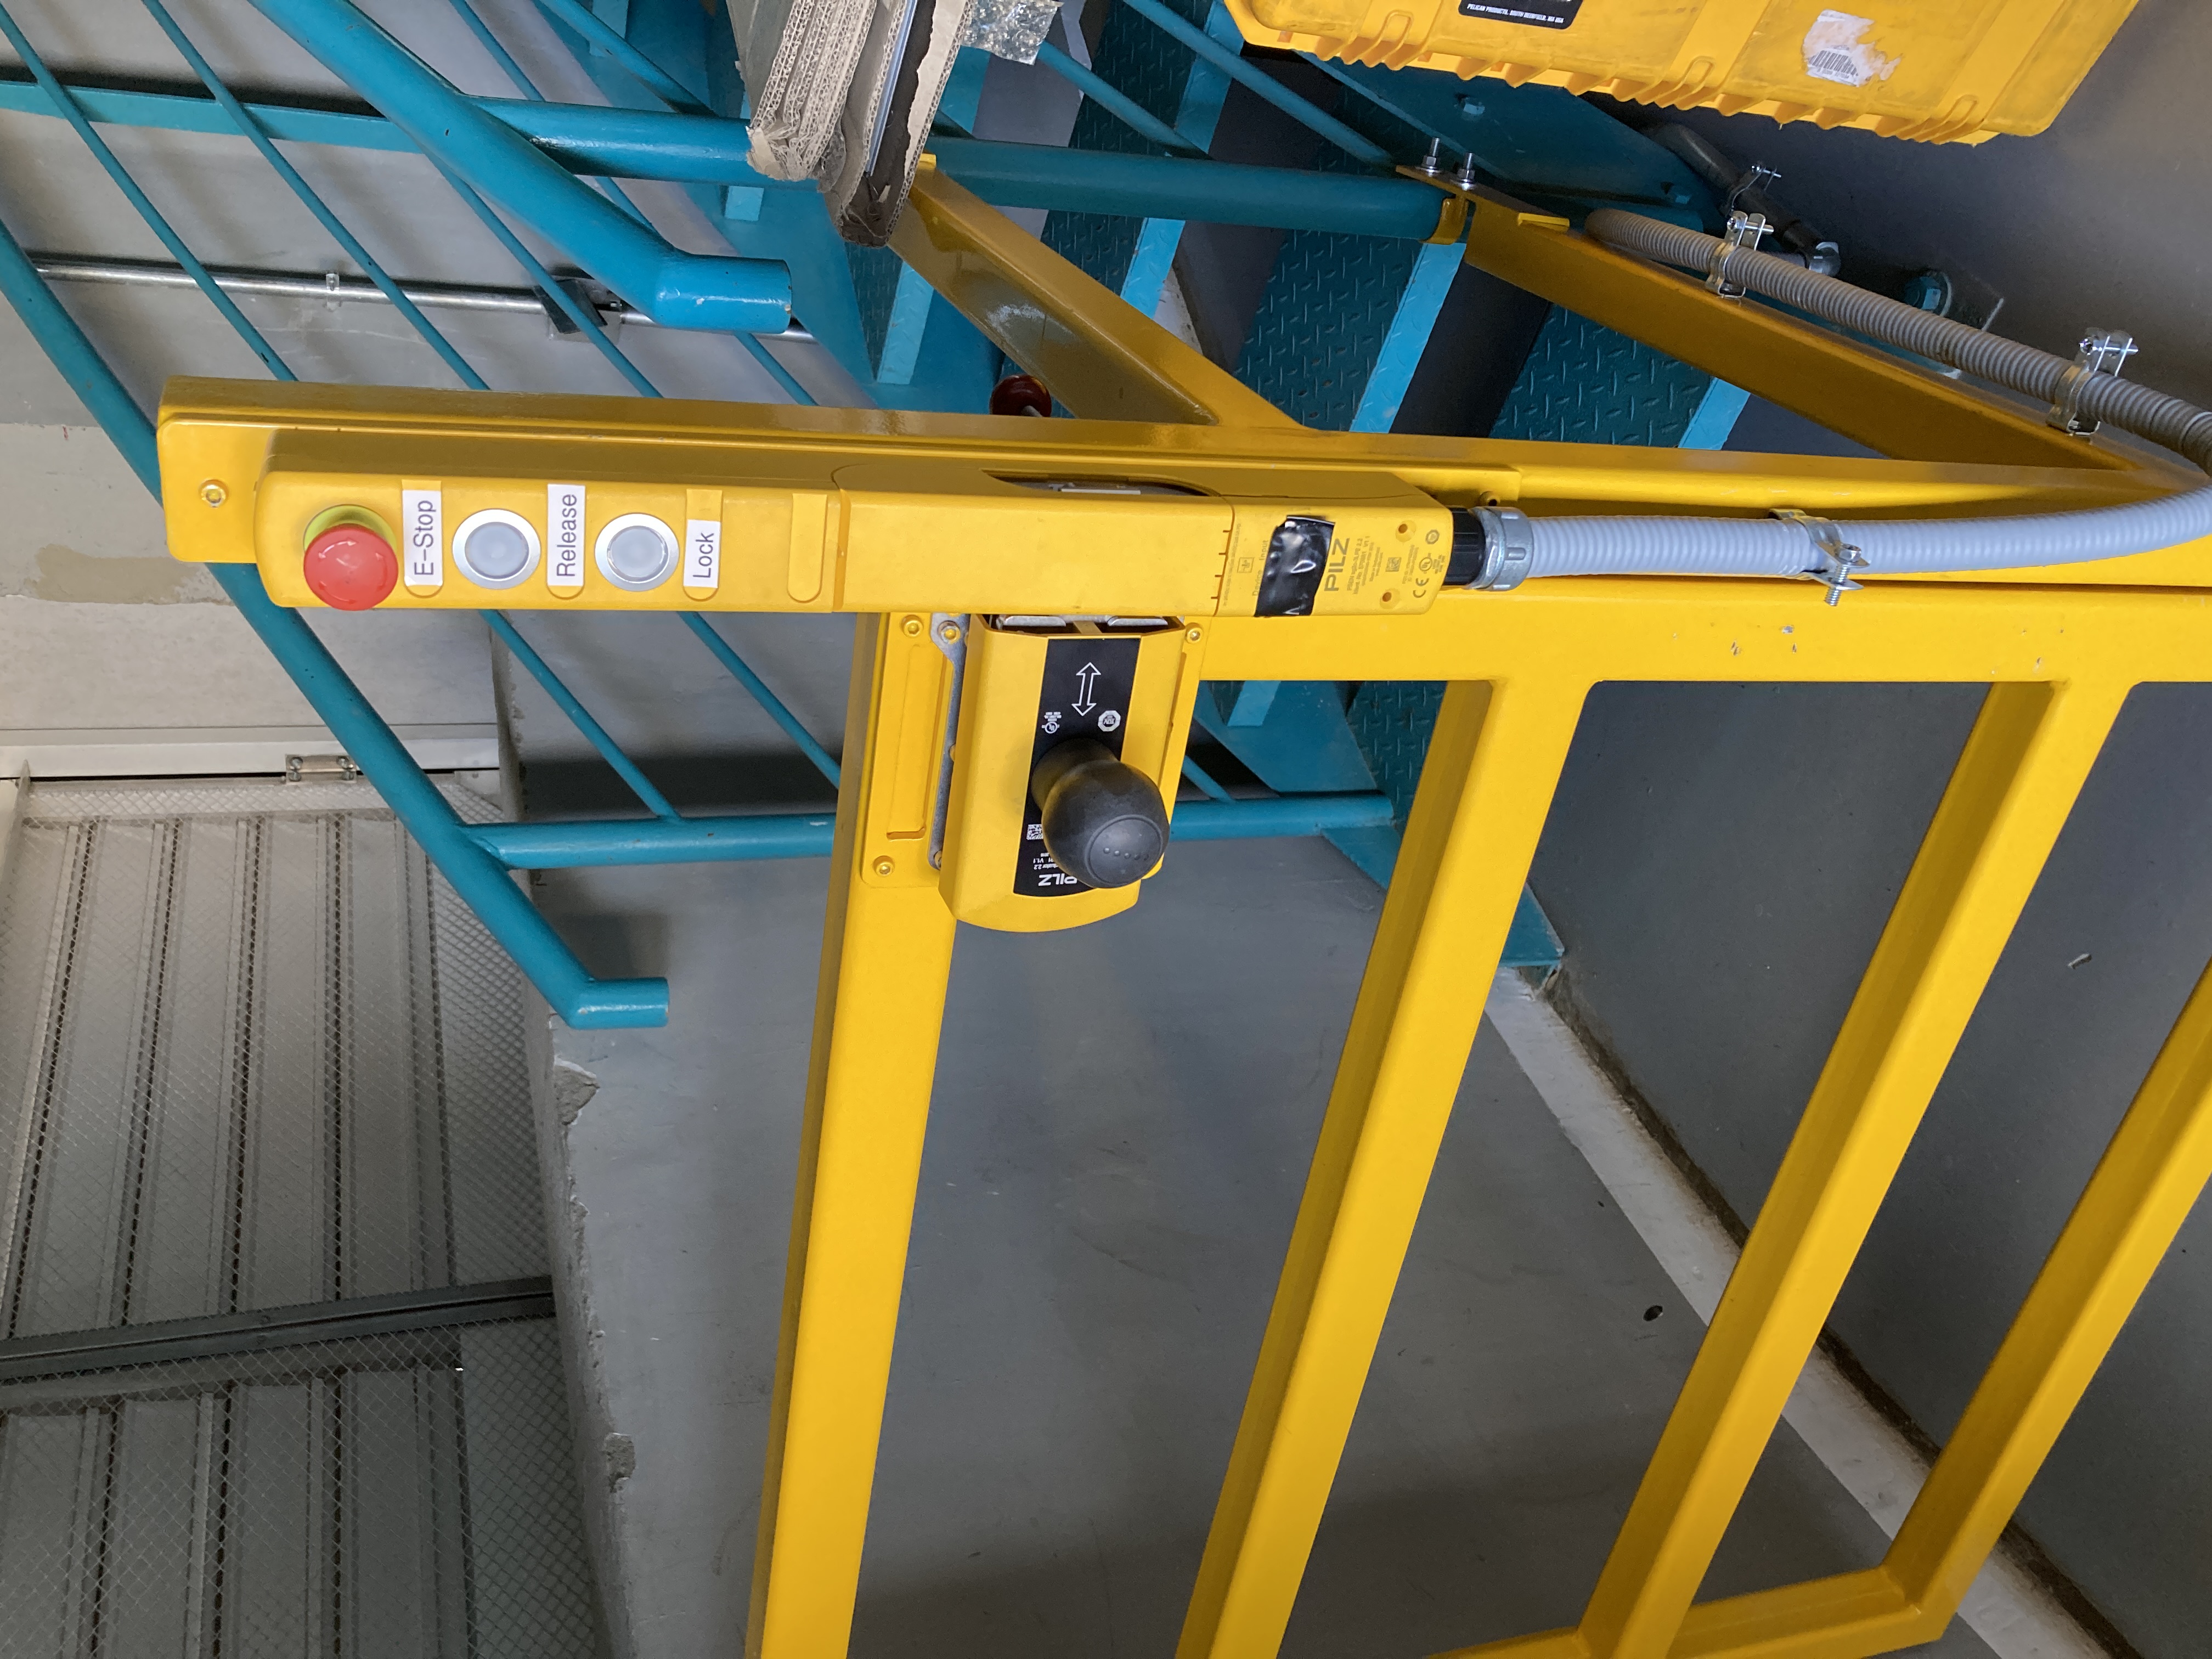
Figure 1: Safety Gate inside the first floor of the AuxTel building.
Push the black handle of the door to the left, and then open the door.
Go up to the second floor and group the visitors at the exact opposite of the stairs, between the calibration bench and the workbenches (see Figure 3). Block the stairs to avoid fall hazard. Please maintain a safe distance from the telescope and dome at all times, and especially when the telescope is moving.
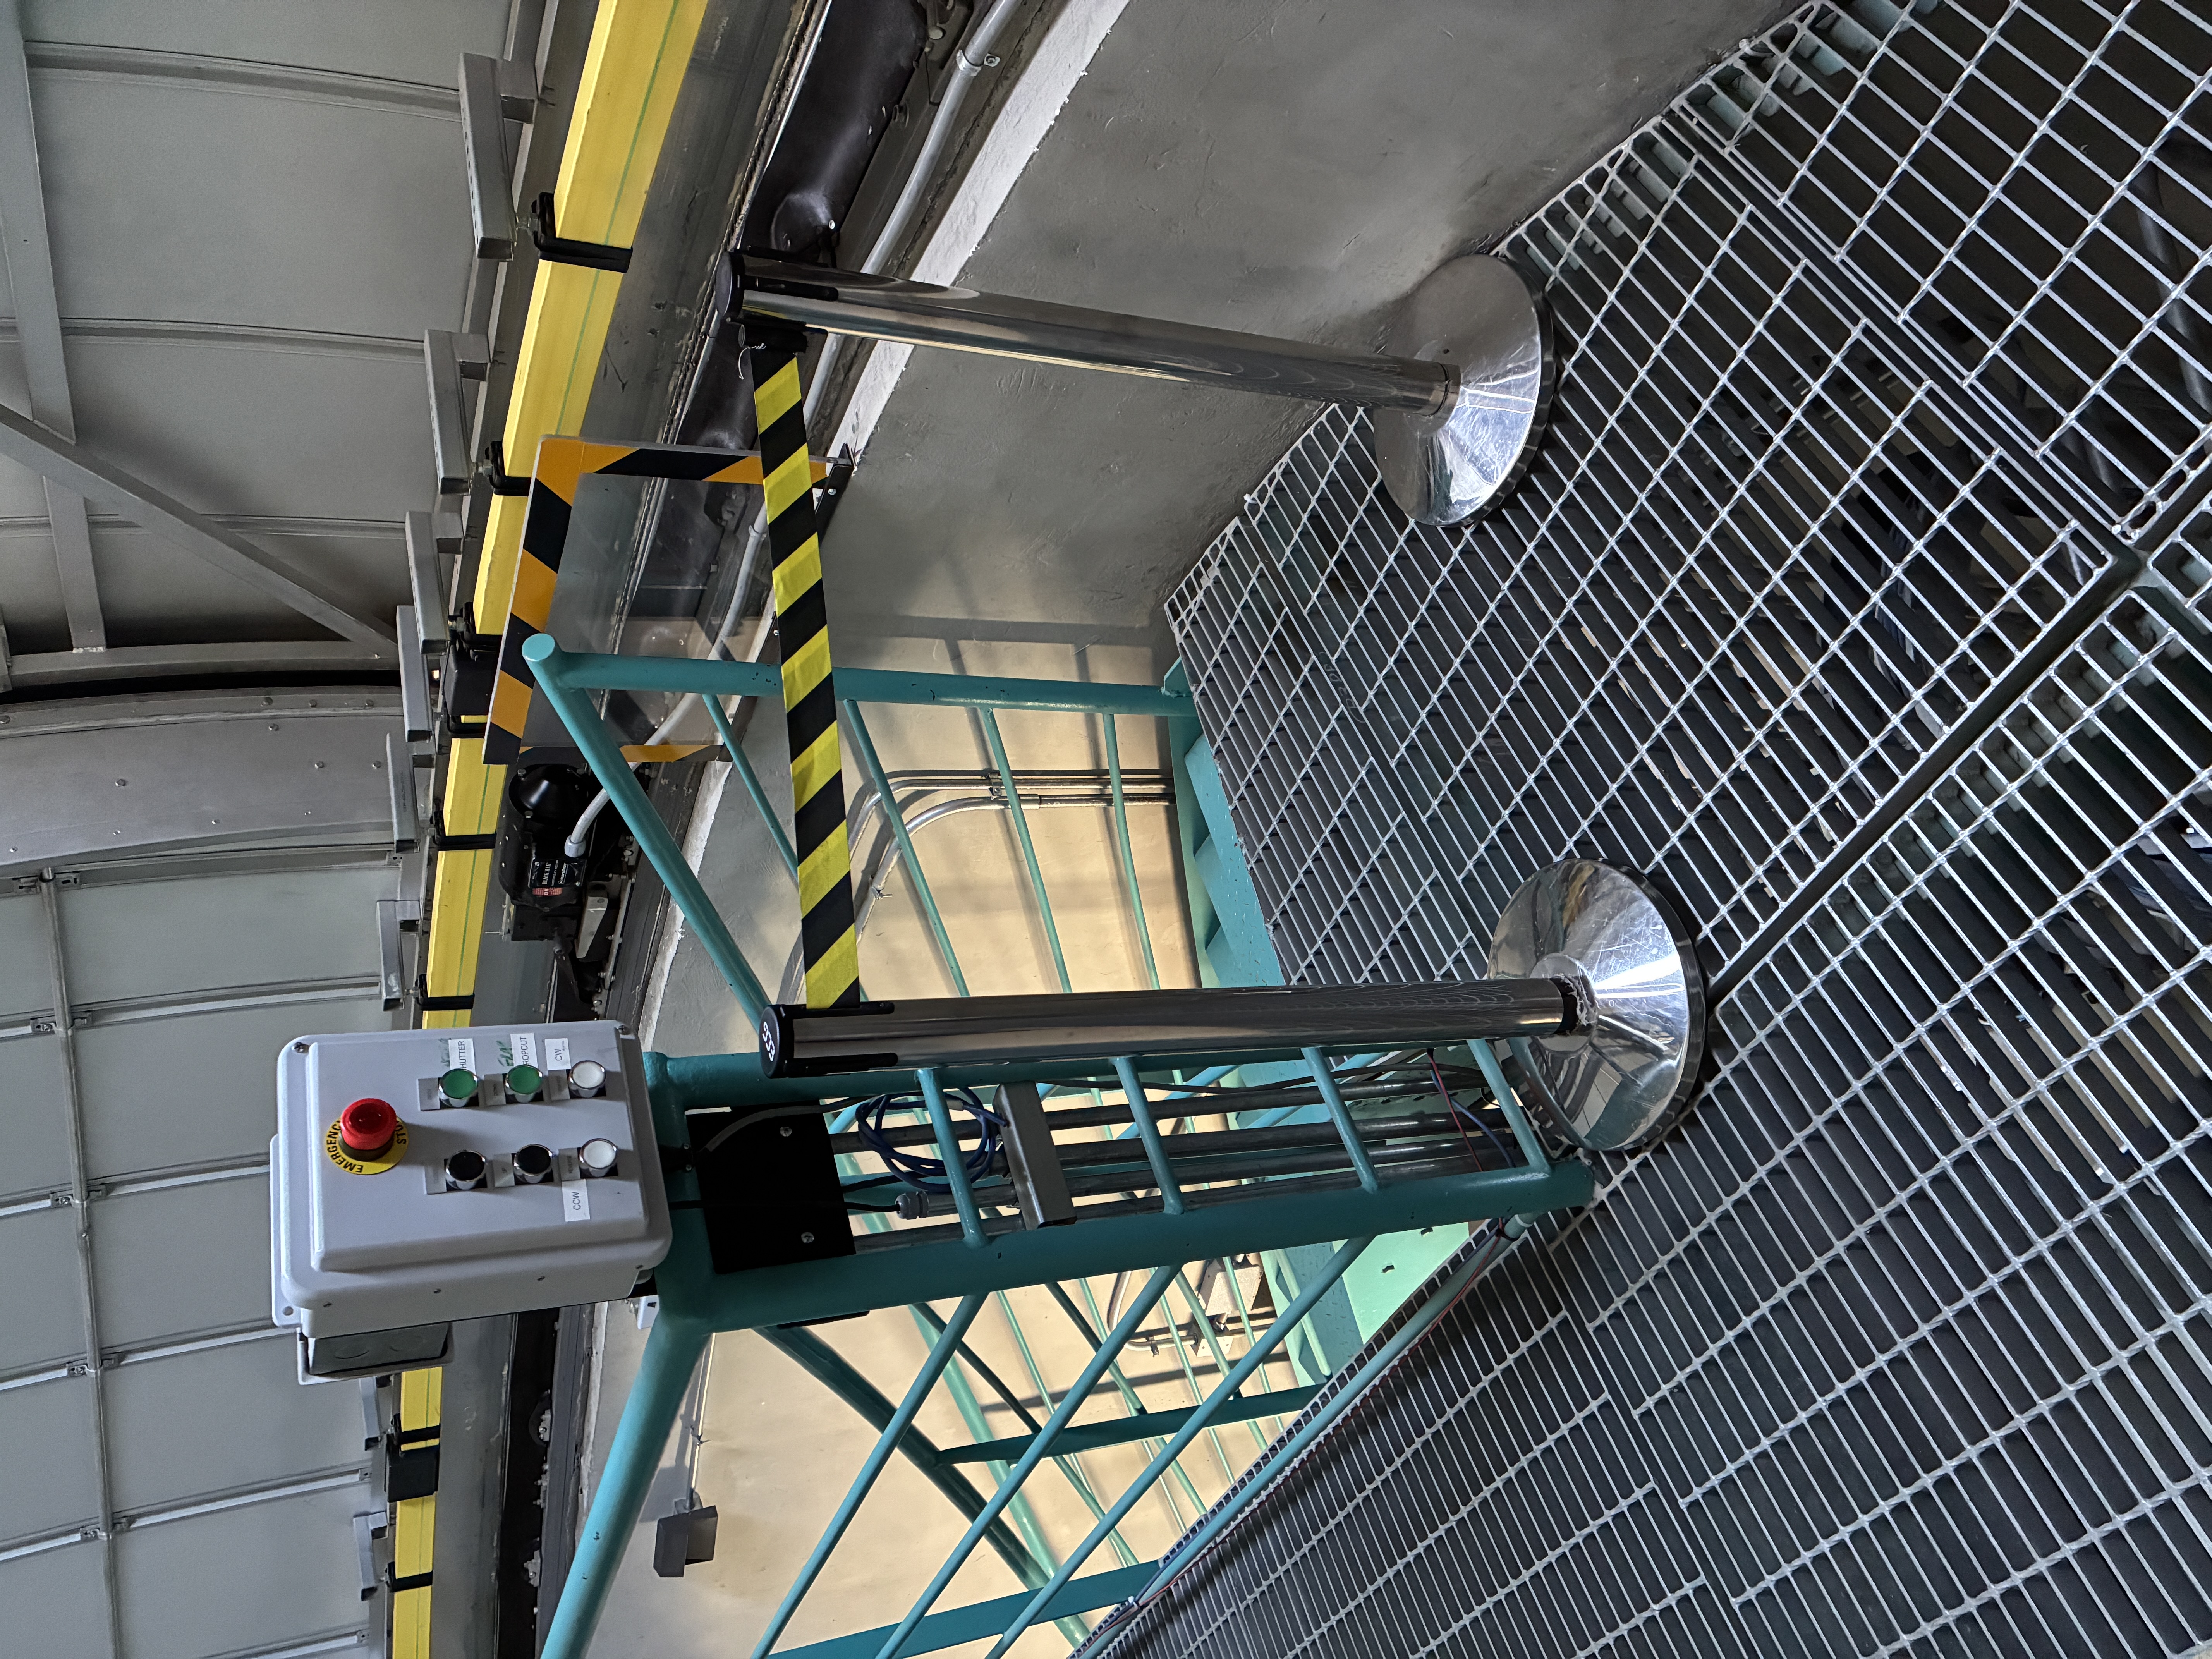
Figure 2: Block the stairs to avoid fall hazard.
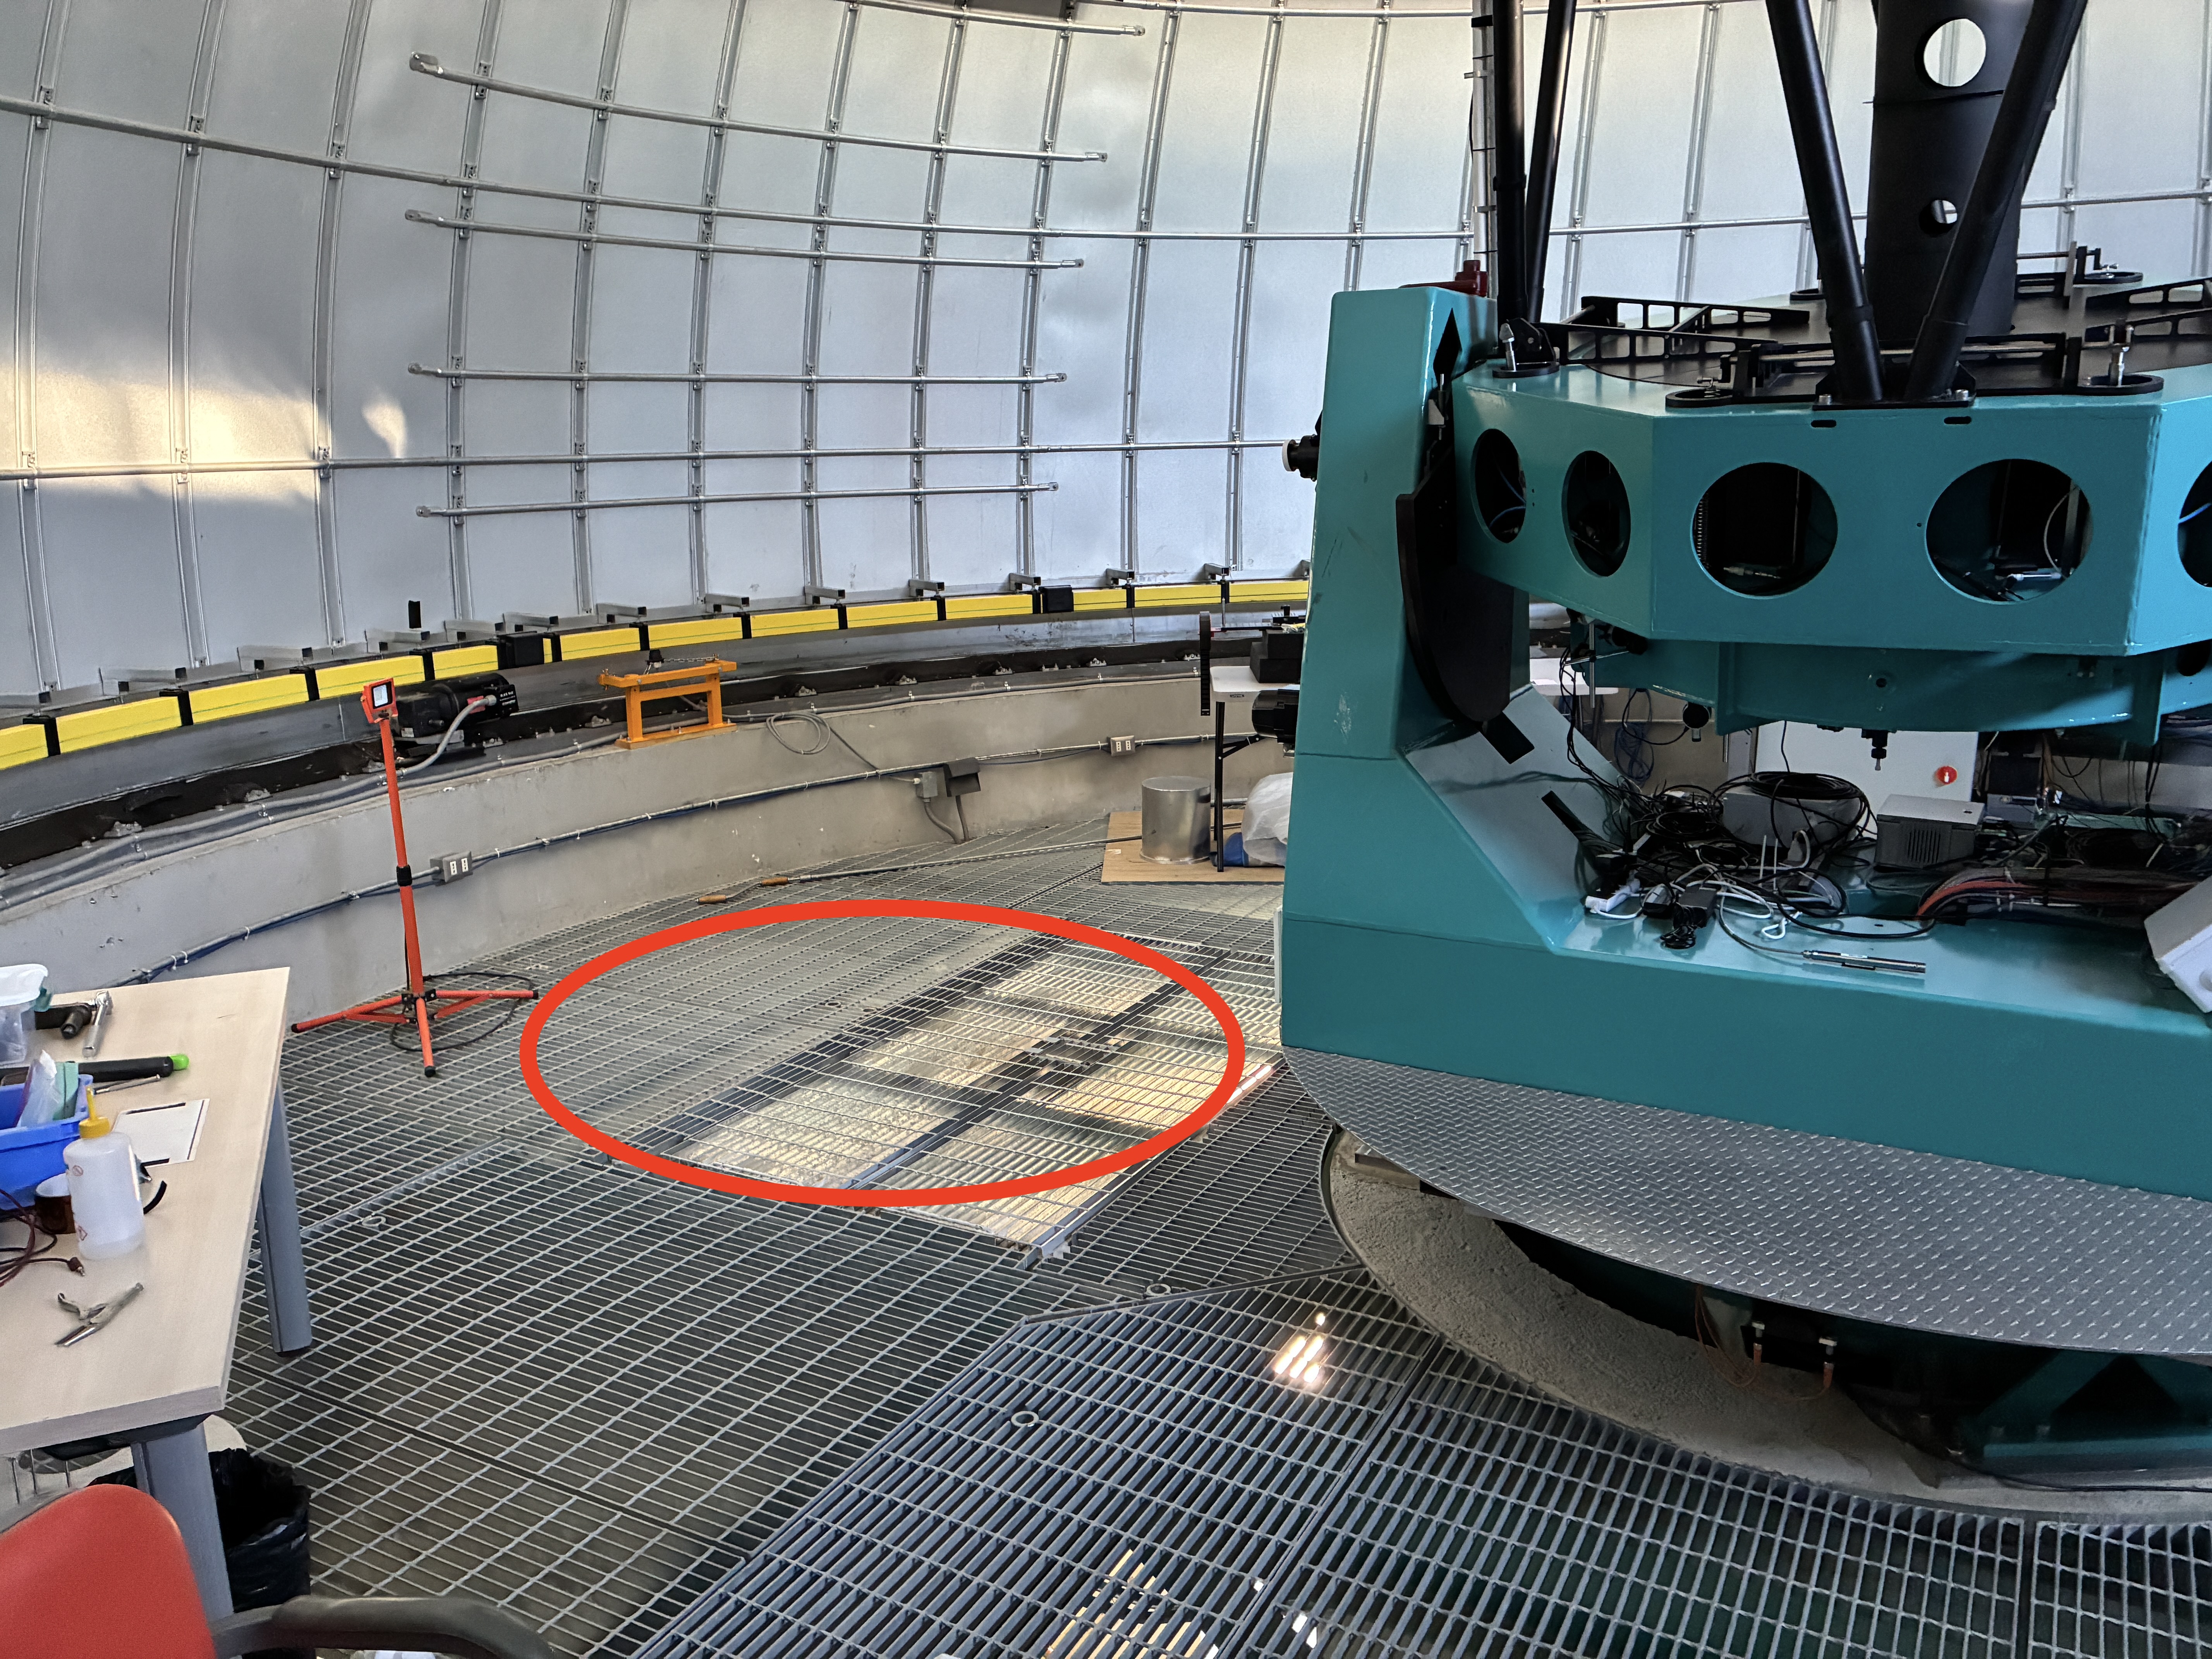
Figure 3: Group the people at the exact opposite of the stairs.
Eyepiece installation: The eyepiece is stored in its labelled box, inside the spare parts cabinet in the first floor of the AuxTel building. Remove the plastic cover from the Nasmyth port #1 black tube, and carefully insert the eyepiece into the slot. While holding the eyepiece with one hand, tighten the two upper screws (highlighted in blue in Figure 4) between the tube and the eyepiece with the other, securing the eyepiece. The other two screws in the lower part of the tube (highlighted in red in Figure 4), when loosened, allow the entire tube to move, providing a greater focusing range.

Figure 4: AuxTel Nasmyth Rotator port #1 with the eyepiece.
Tertiary mirror (M3) manual positioning: The M3 motor is malfunctioning, and the positioning has to be made manually until the motor is replaced by the Electronics Group. Two staff members are needed for this procedure:
Identify the AT Pneumatics Box, beneath the telescope (see Figure 5 for reference), and open it using a screwdriver.
Identify the M3 Indexer hose, and with the help of a screwdriver, depress the blue button highlighted in Figure 6.
While one person holds the button depressed, the other one will have to manually rotate the M3 rotating table 180º (see Figure 7).
Once the M3 is in position, the blue button in the AT Pneumatics Box can be un-pressed.
A slight manual adjustment will be needed in M3, until the piston gets inserted (producing a sound during the insertion). This is important, since once the piston is engaged, the rotary table will be locked.
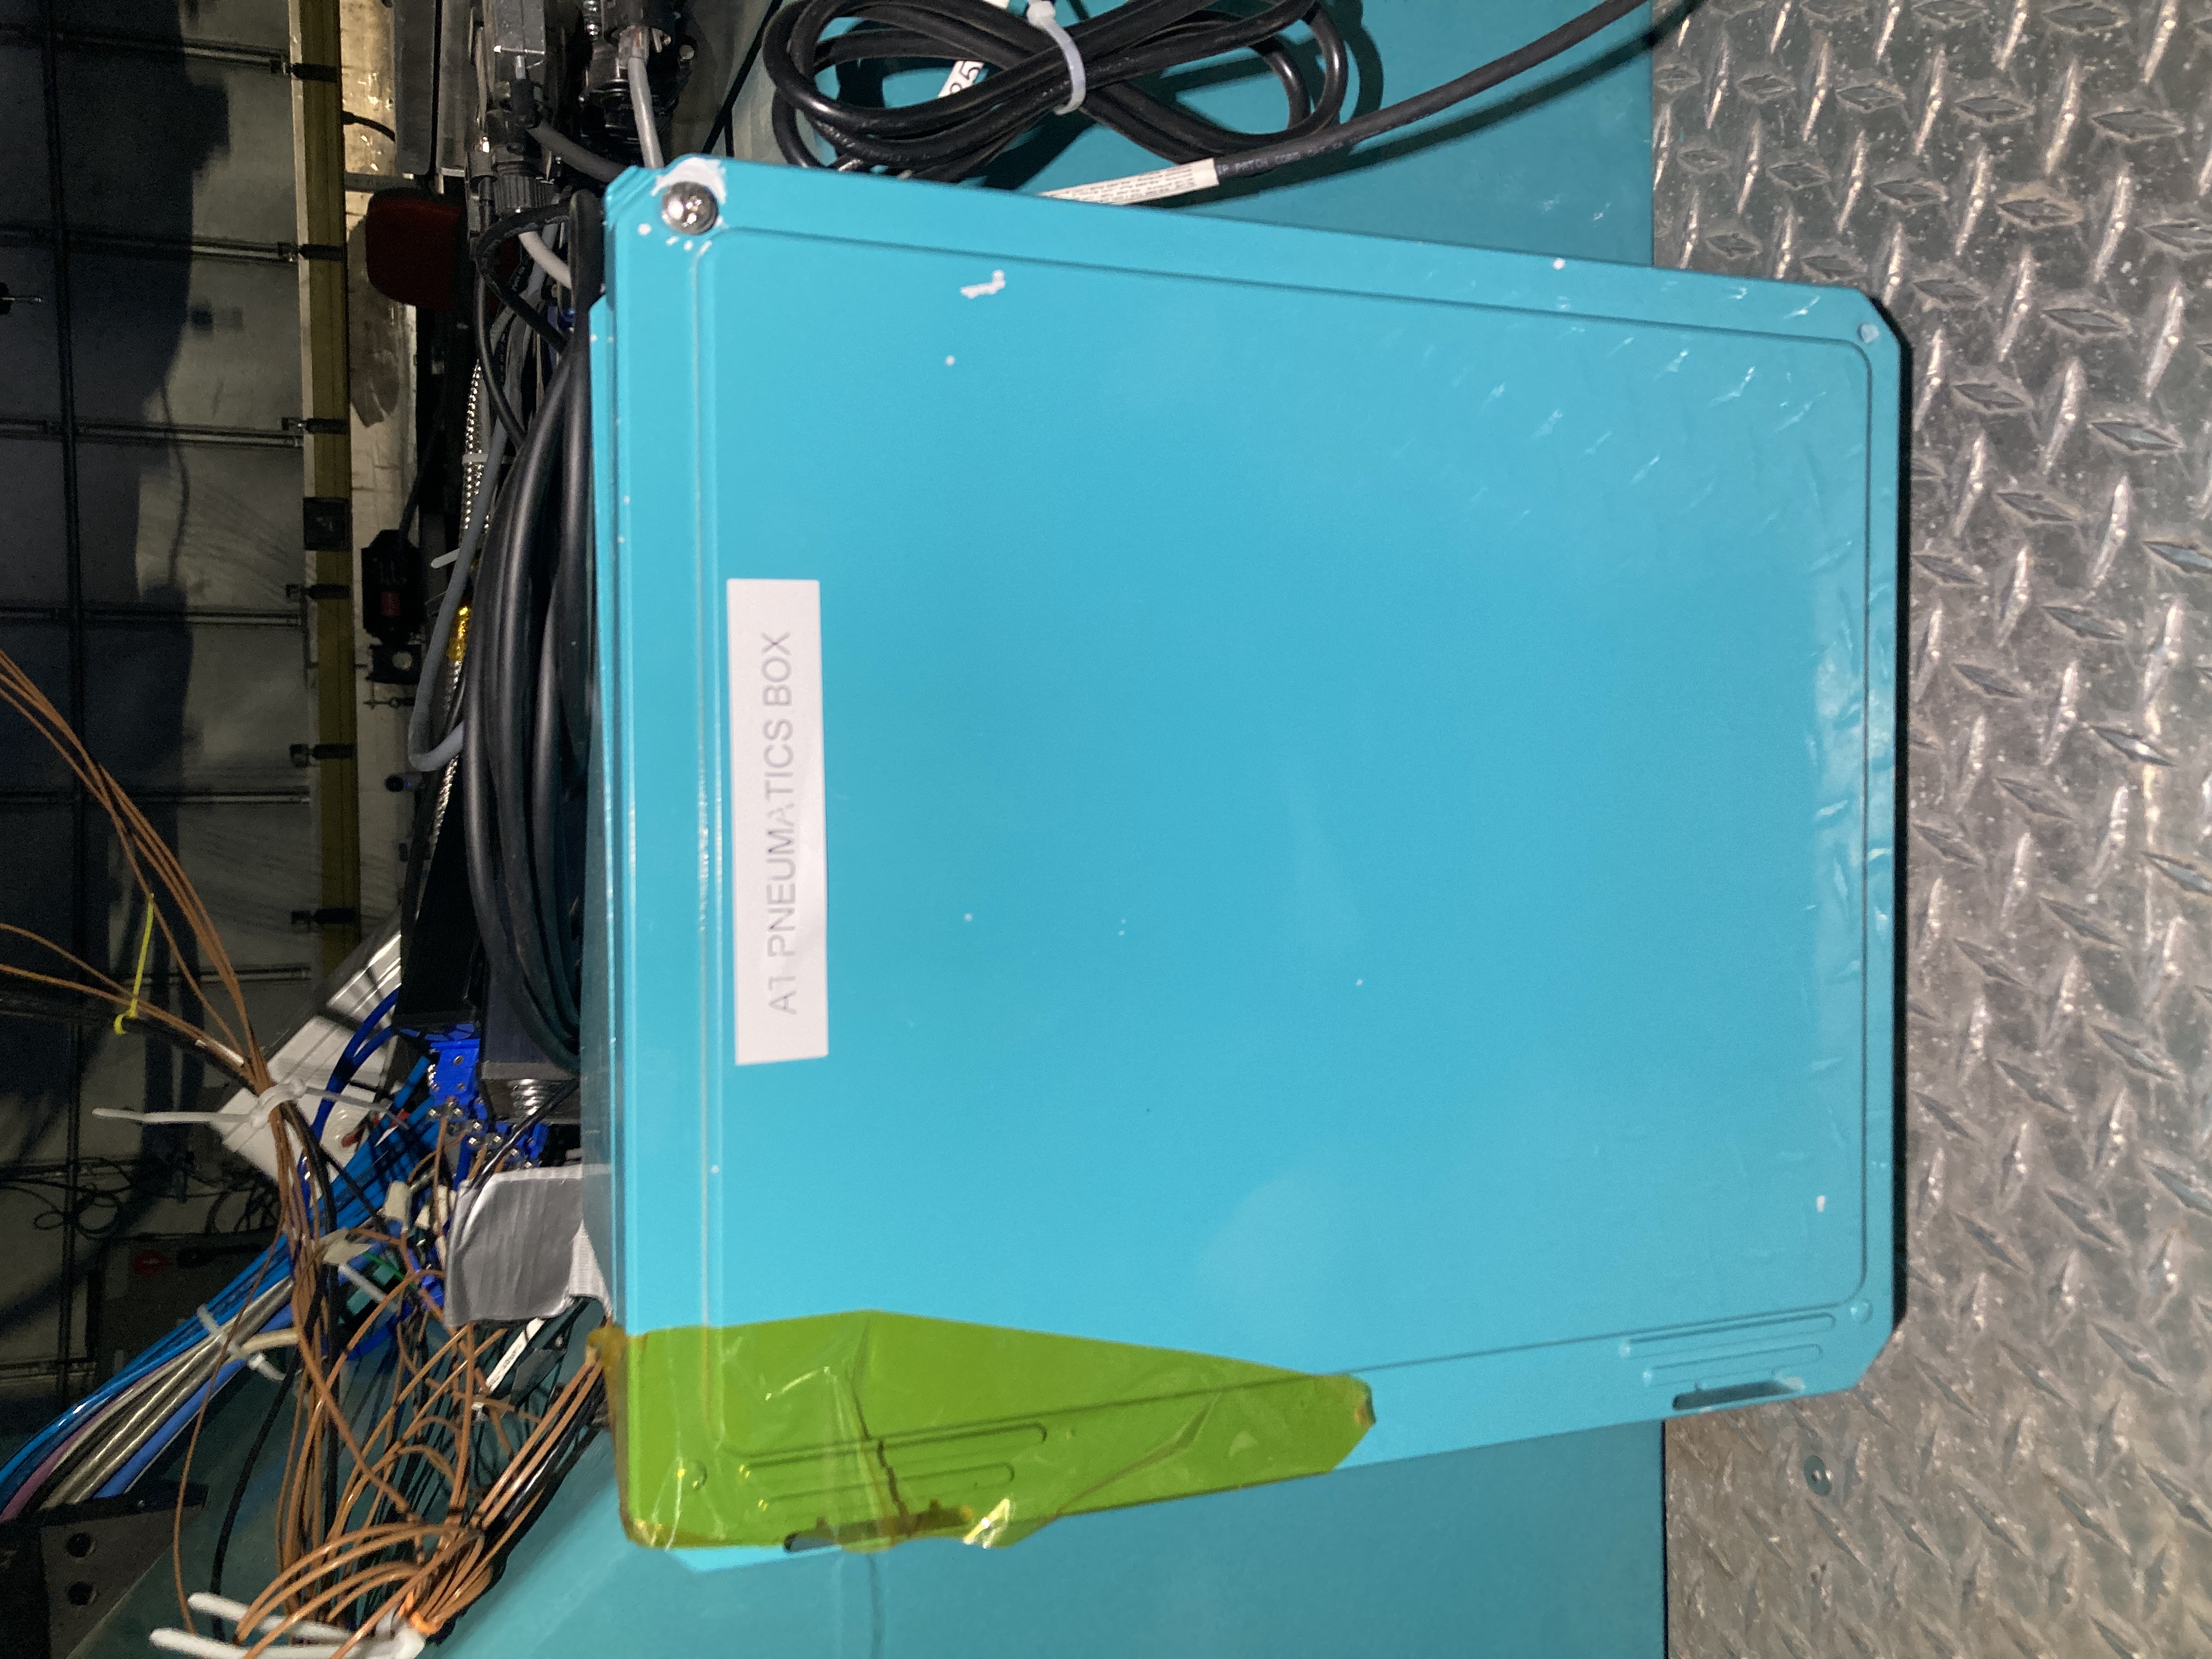
Figure 5: AT Pneumatics Box.
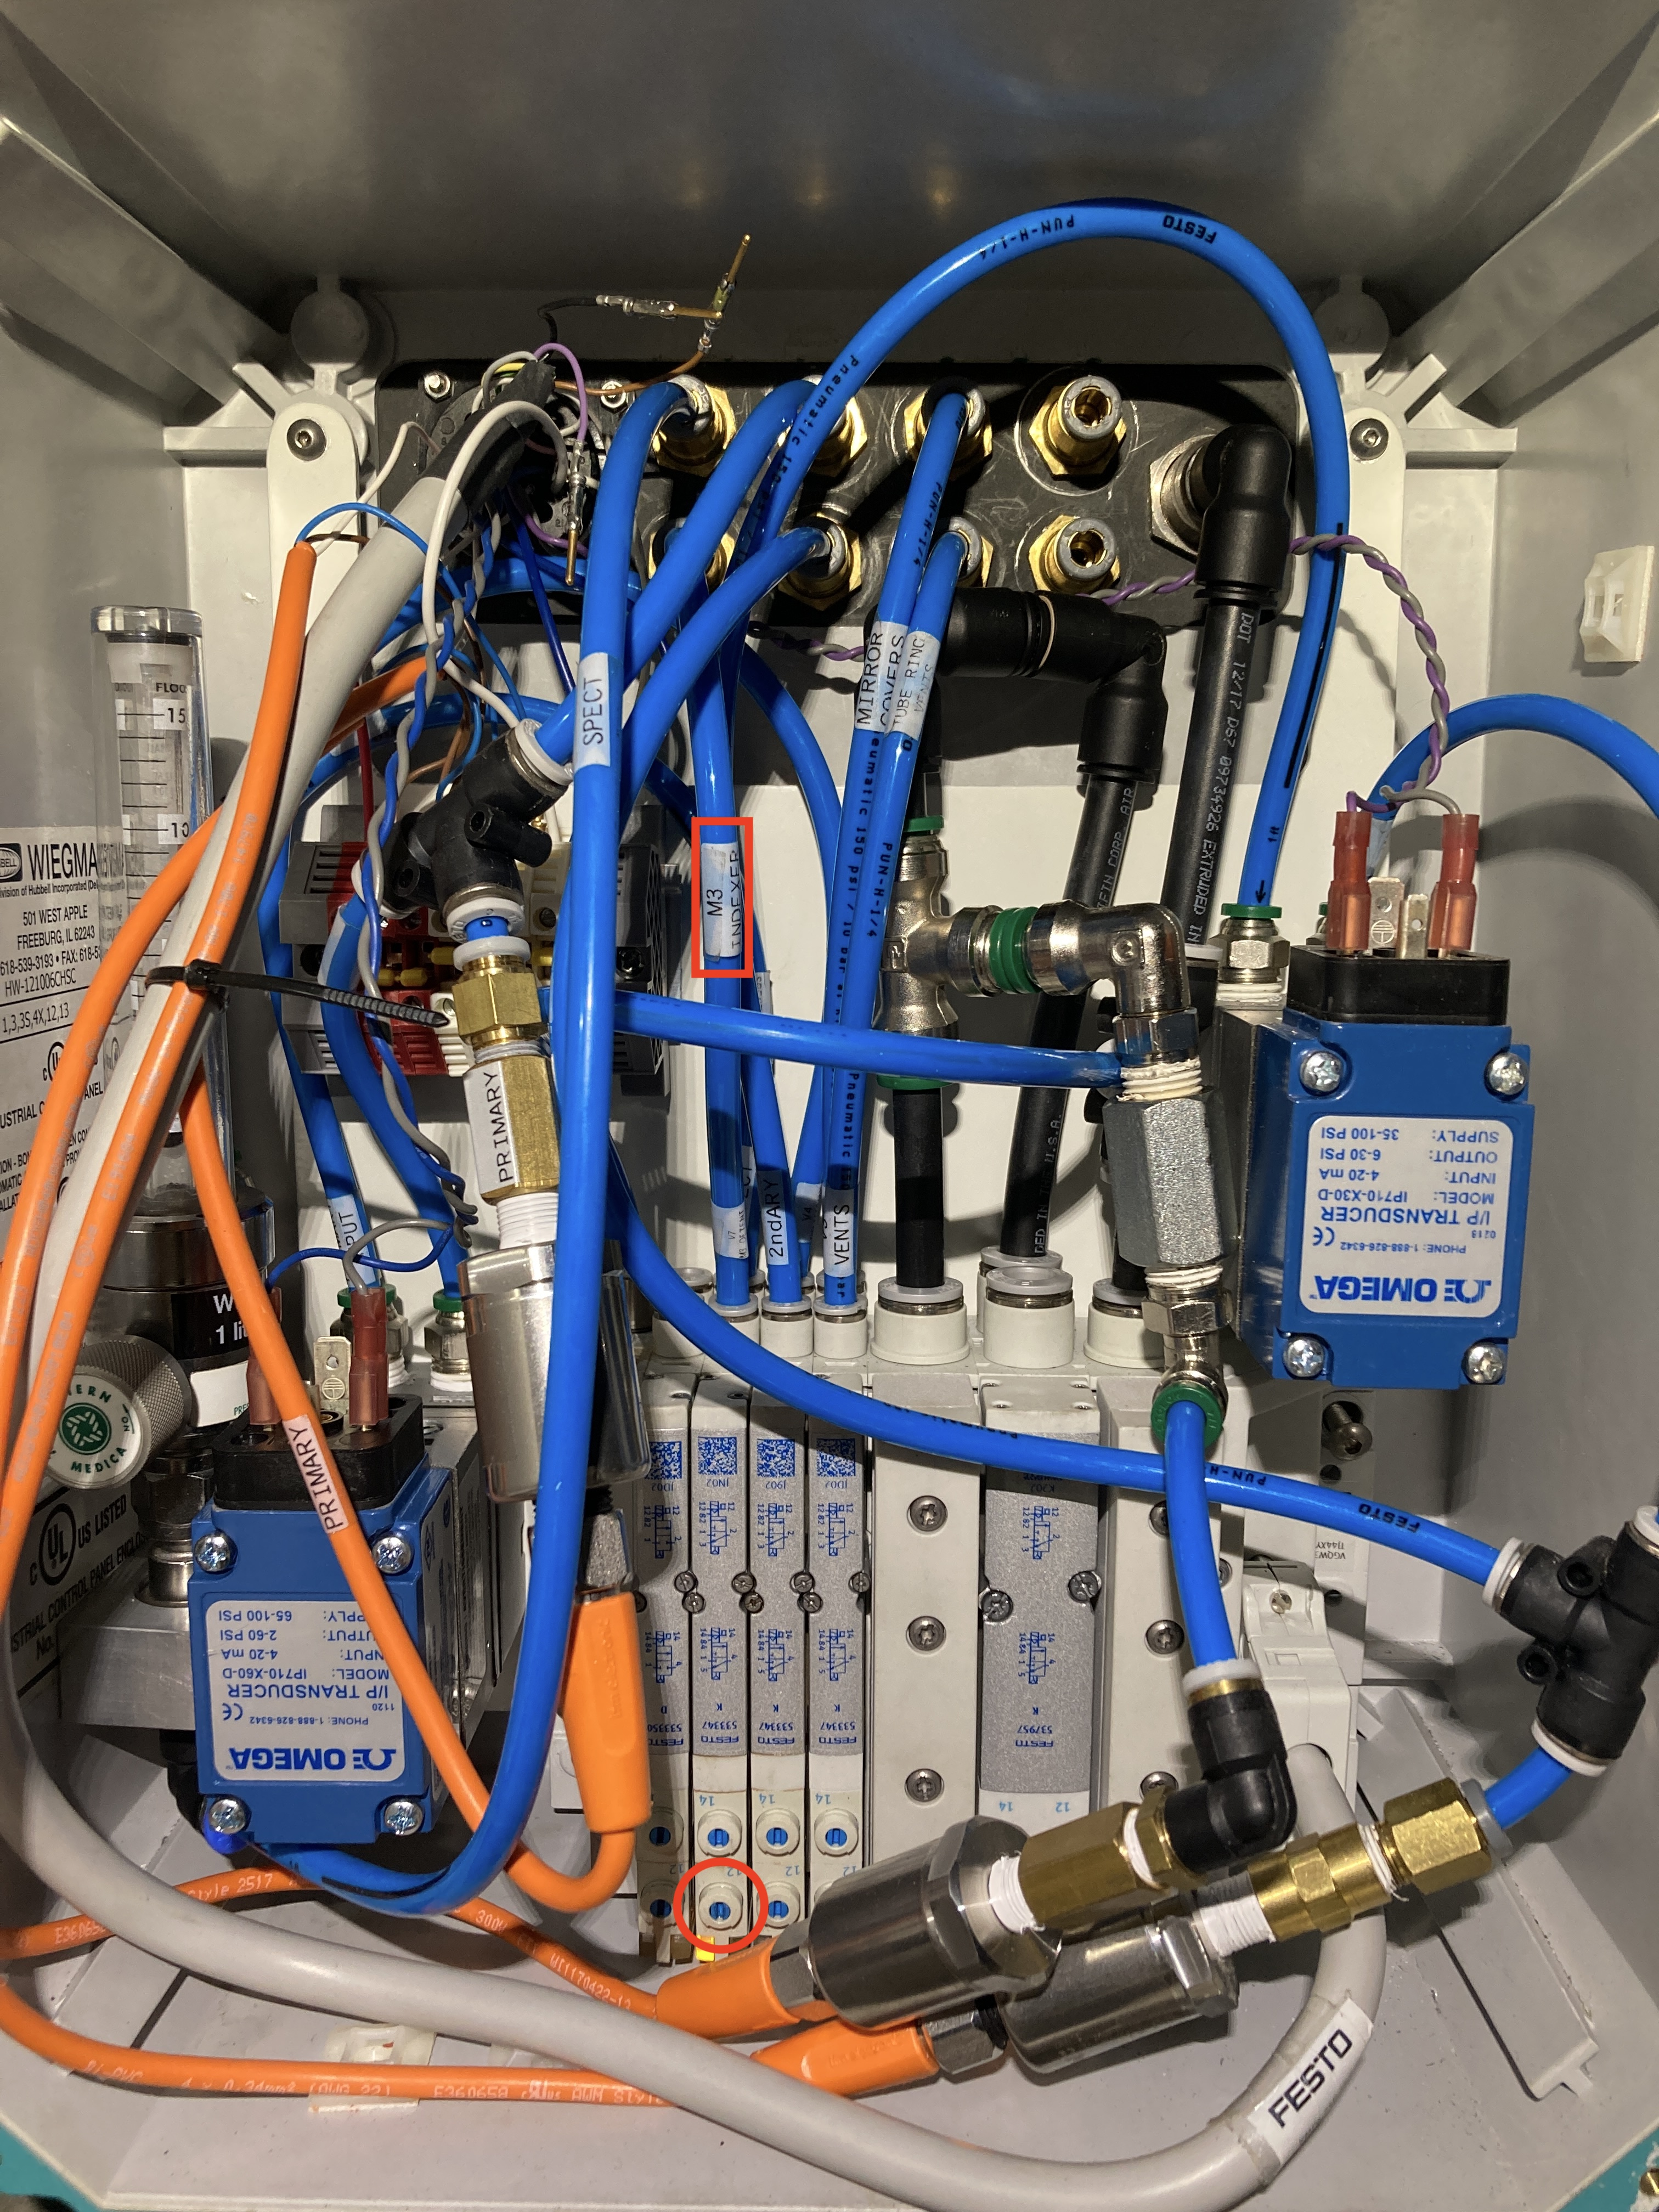
Figure 6: Festo valve button to be depressed, highlighted with a red circle. Make sure it is the button under the M3 indexer line, highlighted with a red square.
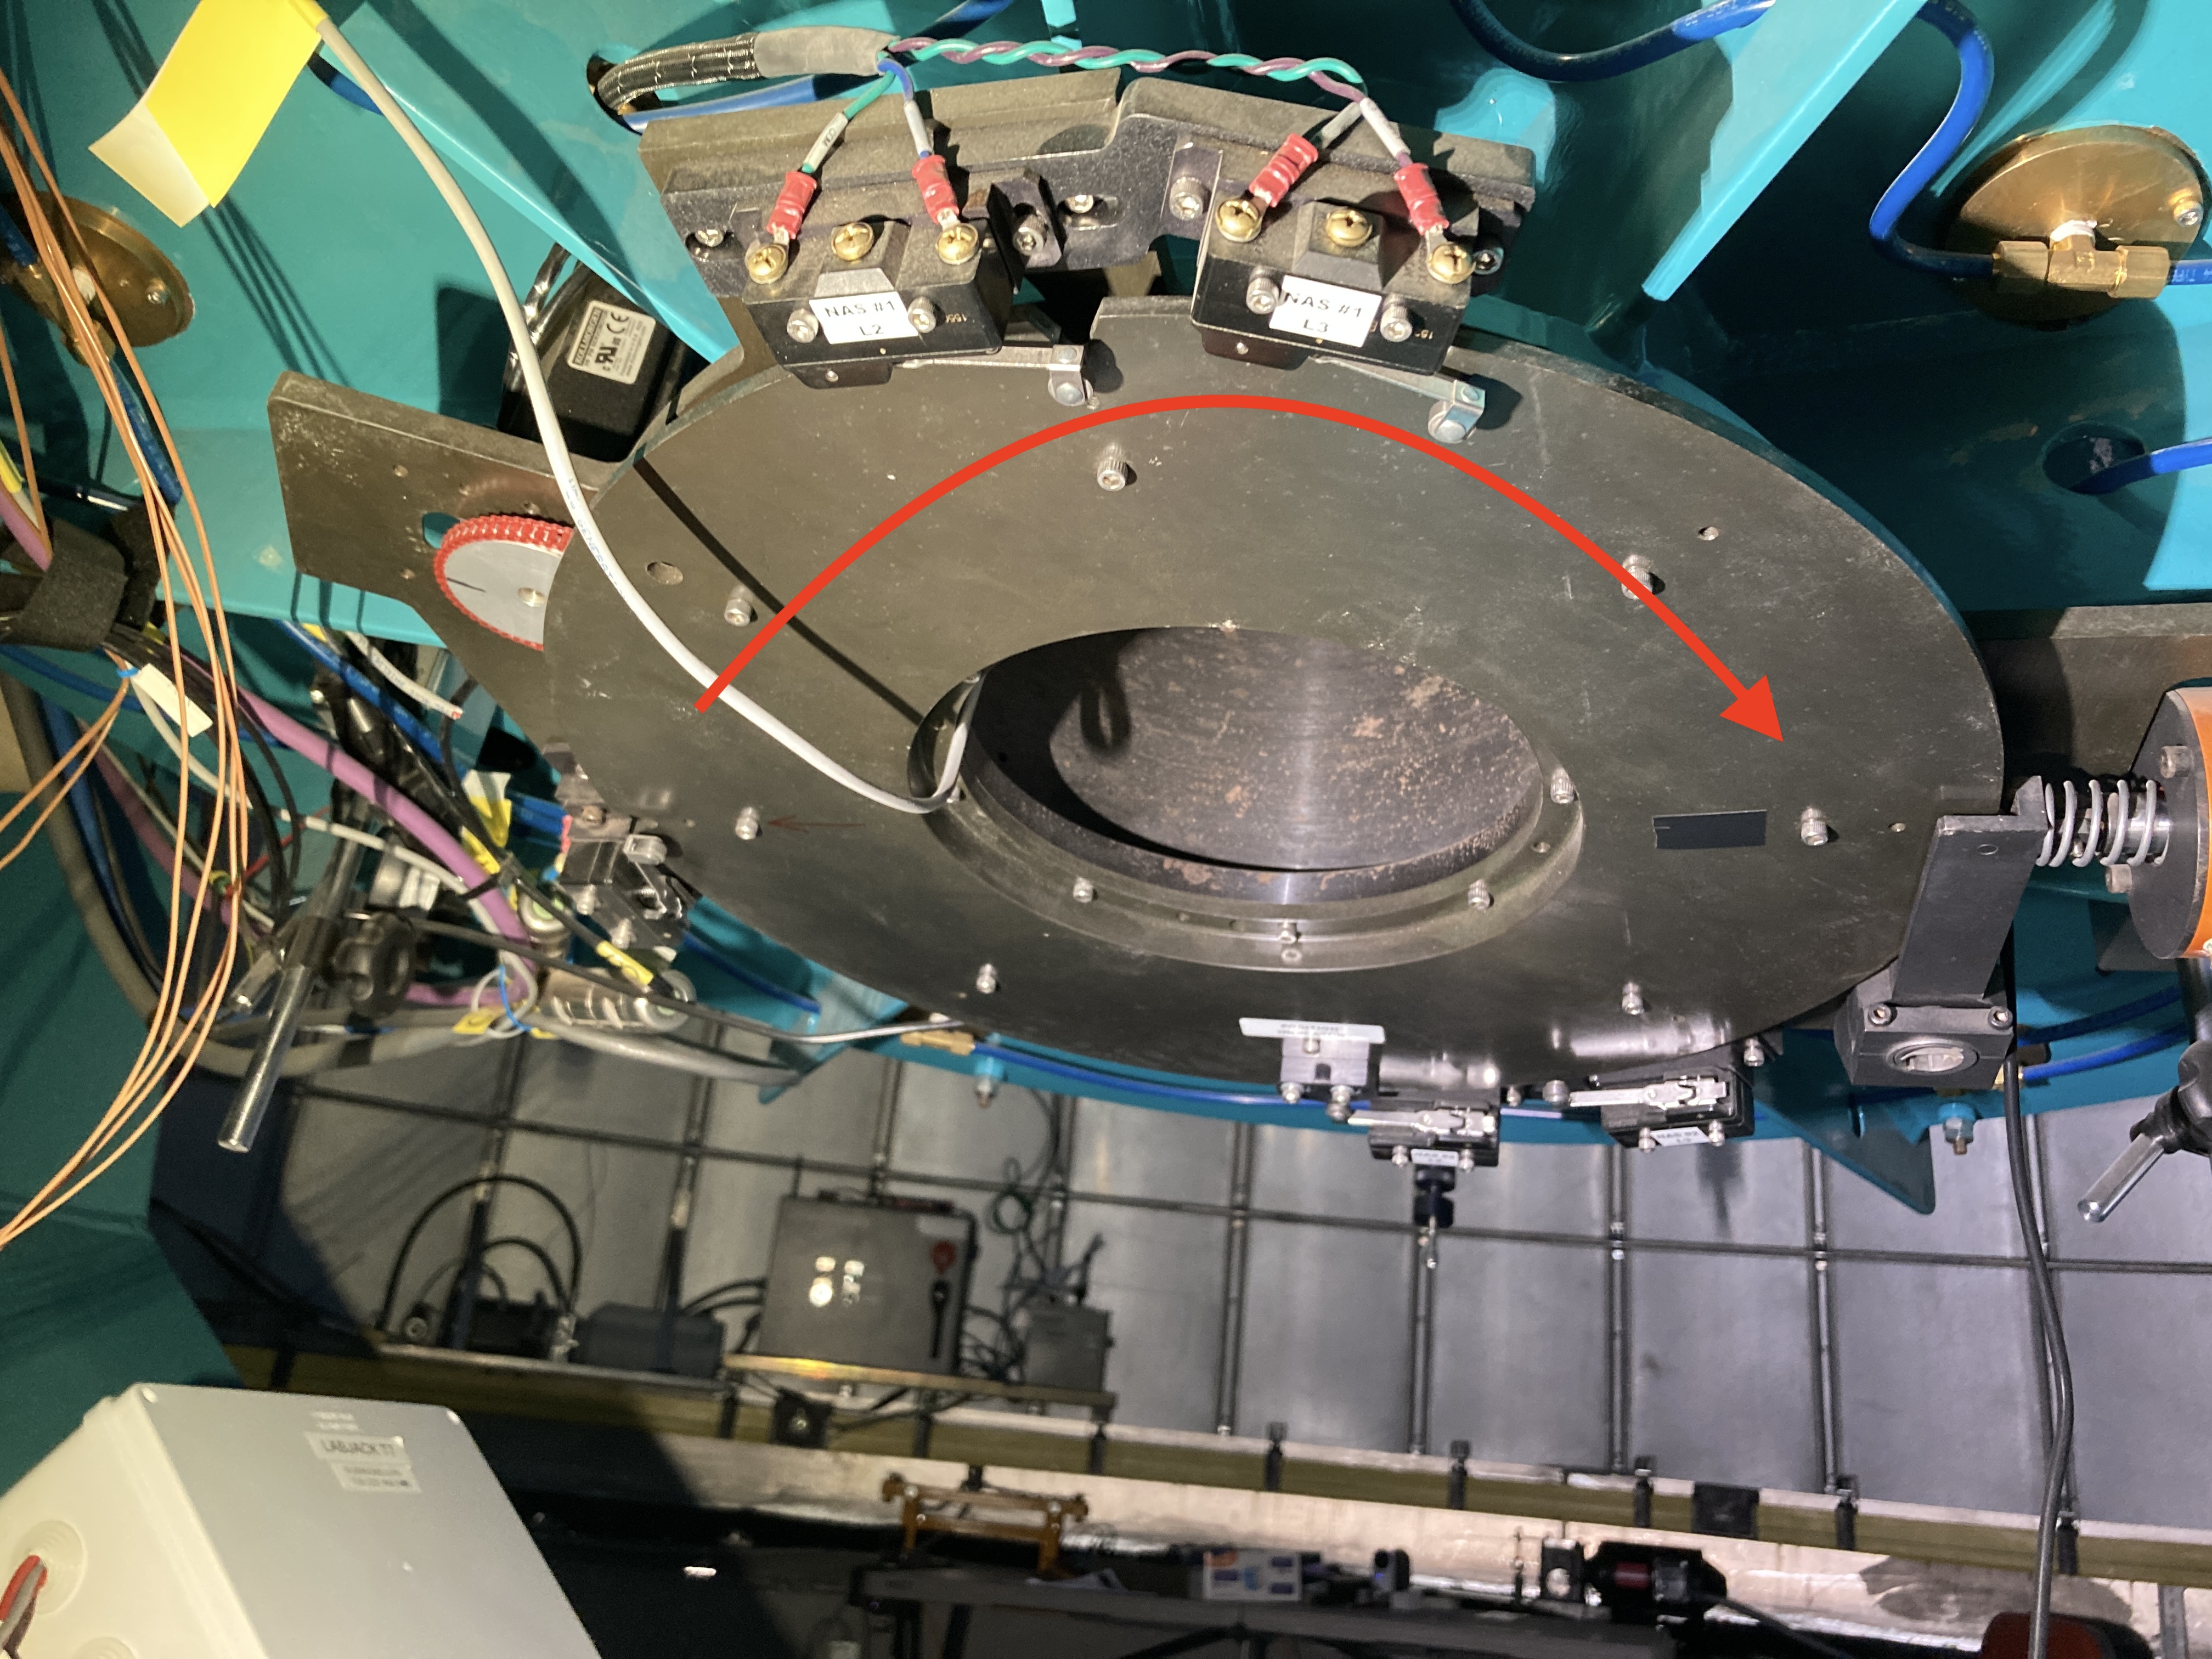
Figure 7: M3 rotating table.
Before moving the telescope and dome, carefully inspect that there are no objects or people in the way.
Go down to the first floor, close the Safety Gate and pull the black handle to the right to lock it.
Press the lock button. A click sound will be heard, engaging the lock.
Push the Safety Gate Bypass button on the ATMCS/Pneumatics (labeled AT Control Cabinet). This action will bypass the interlock that is triggered when the safety door is opened.
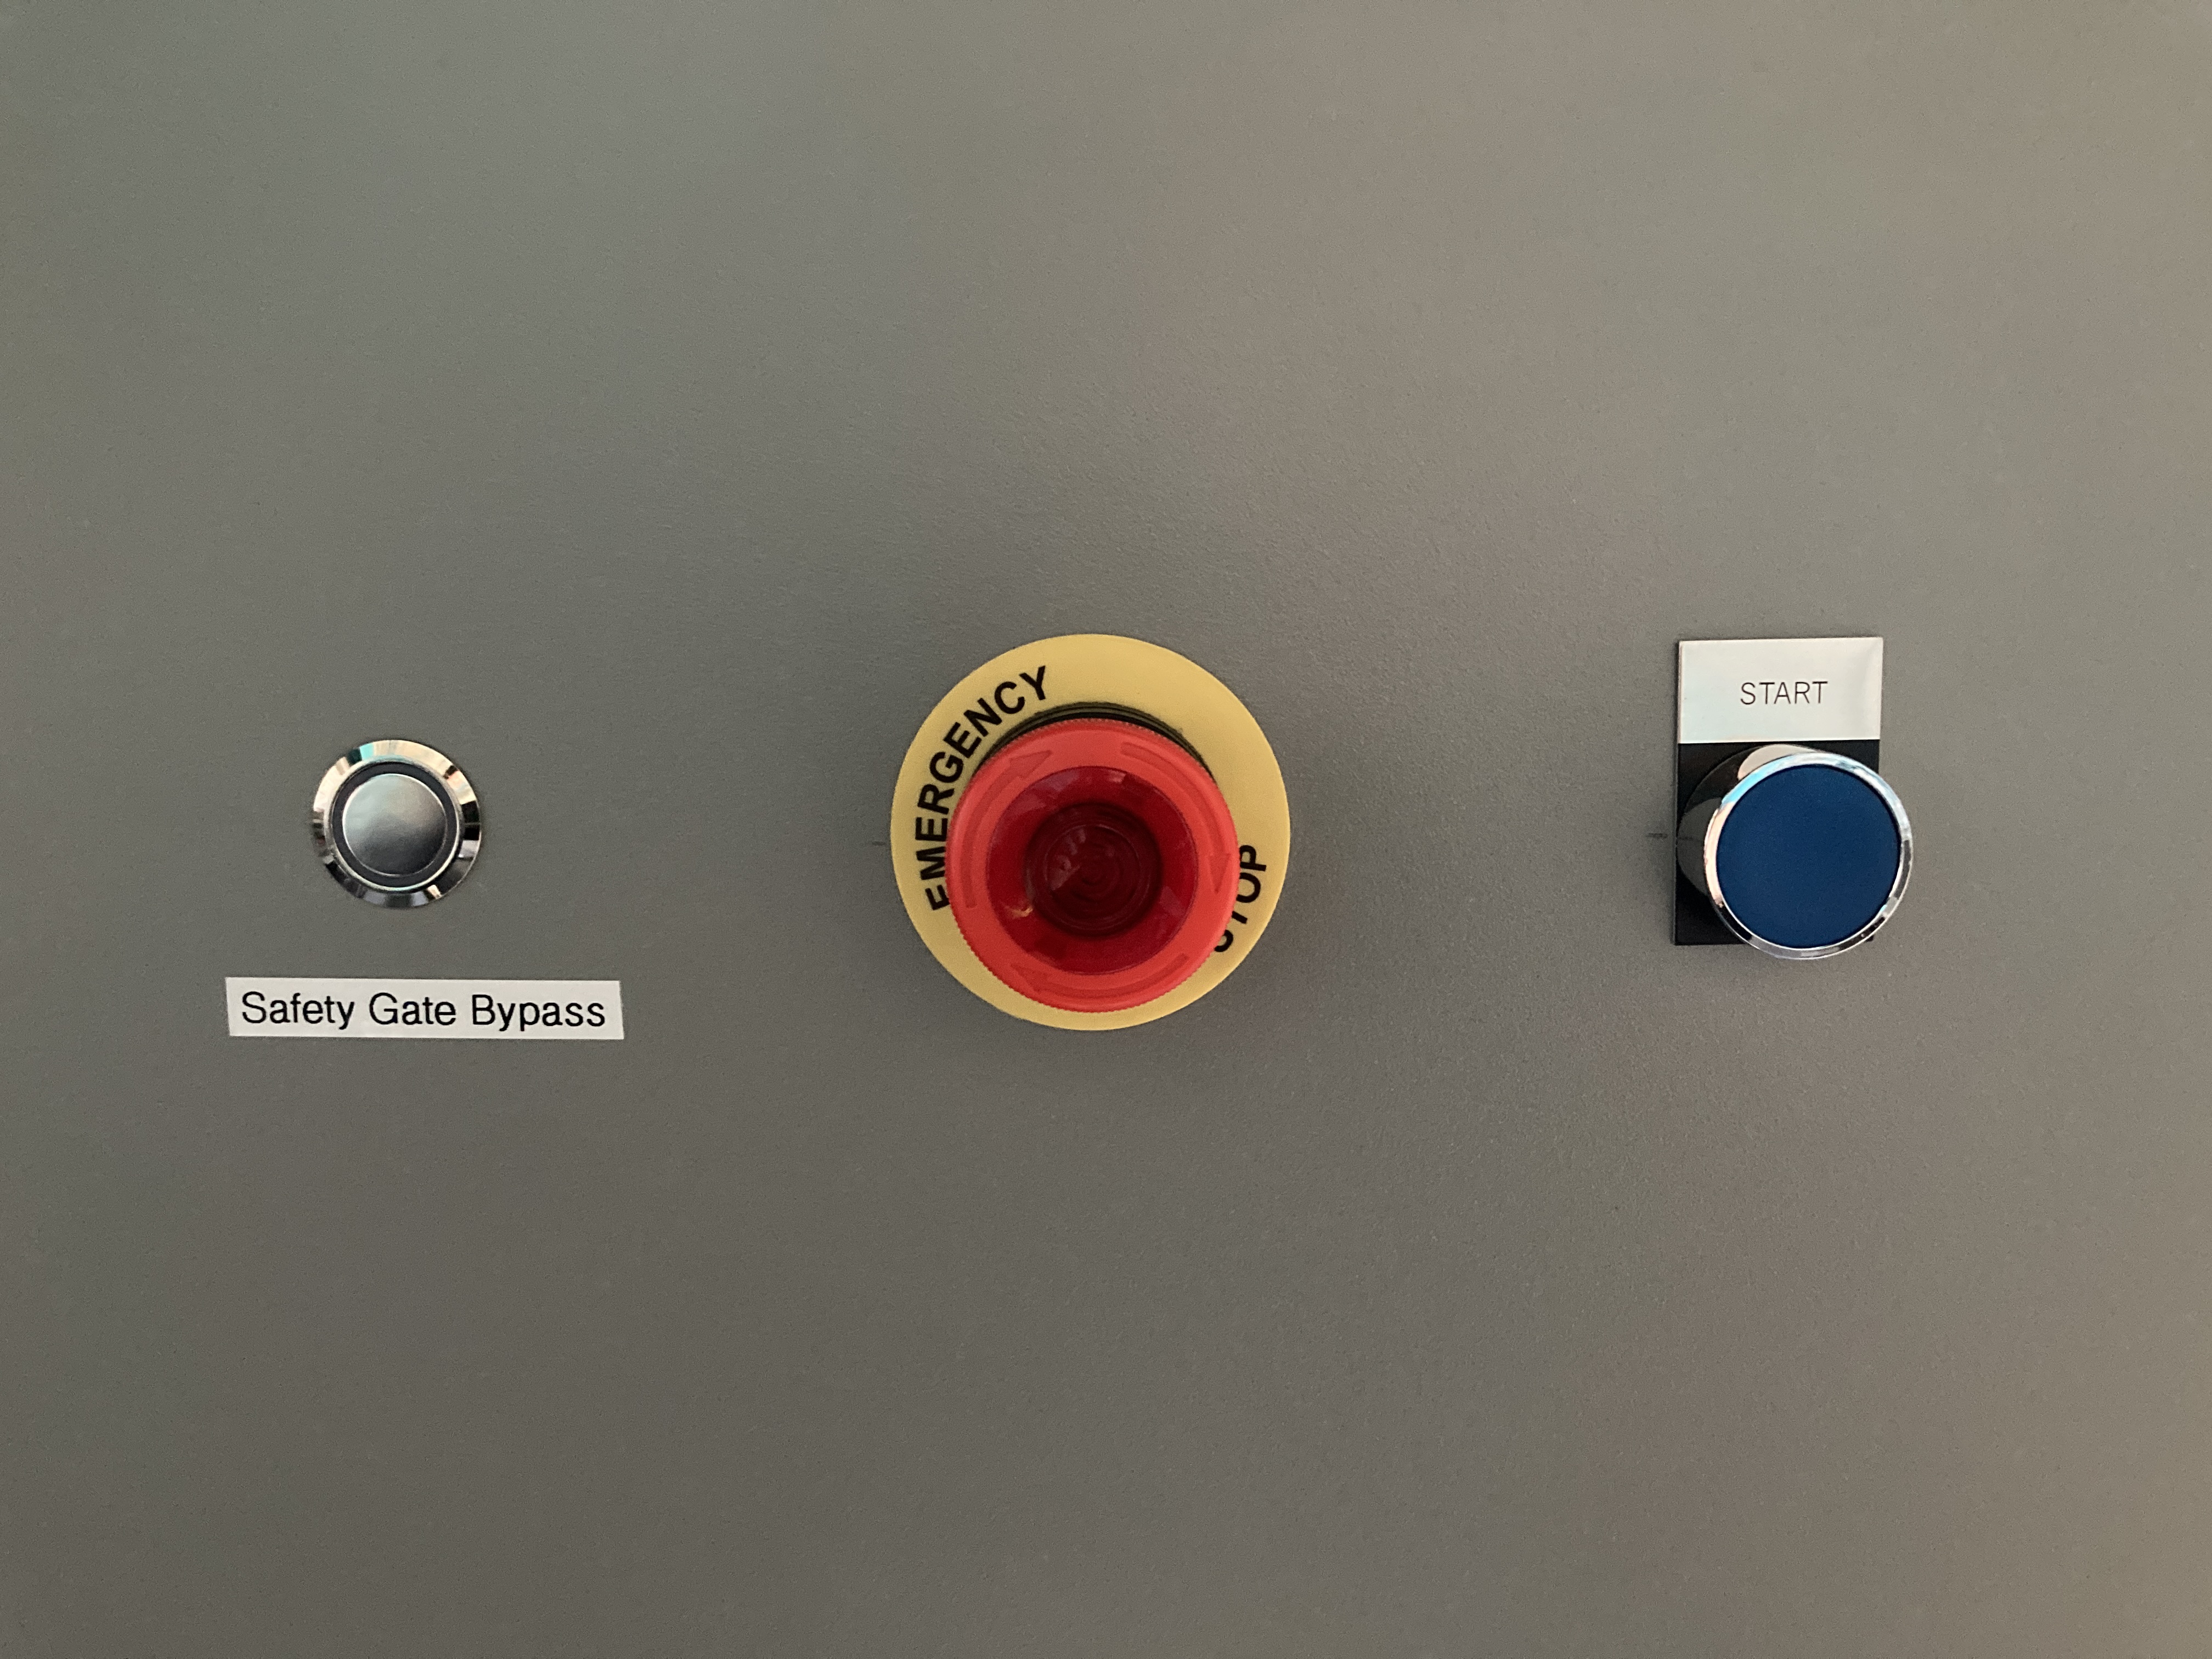
Figure 8: Safety Gate Bypass activation button.
Repeat steps 5 and 6 to release the Safety Gate and open it.
The following tasks must be performed by experienced personnel or an OS. Initialize the AuxTel telescope, dome, and shutters. Slew to a target once all systems are ready for operations. Auxtel/track_target.py can be used for this in ATQueue, with different options:
Slew to RA/Dec coordinates, where RA is in decimal hours (not degrees!) and Dec is in decimal degrees.
slew_icrs:
   ra: 12.37
   dec: -13.75
slew_icrs to an object name.
slew_planet to a Solar System planet.
slew_planet:
   planet_name: SATURN
Once the telescope and dome are in position, you can begin observing with the eyepiece. A black and metallic step stool is available on the second floor, should it be needed to reach the eyepiece comfortably.
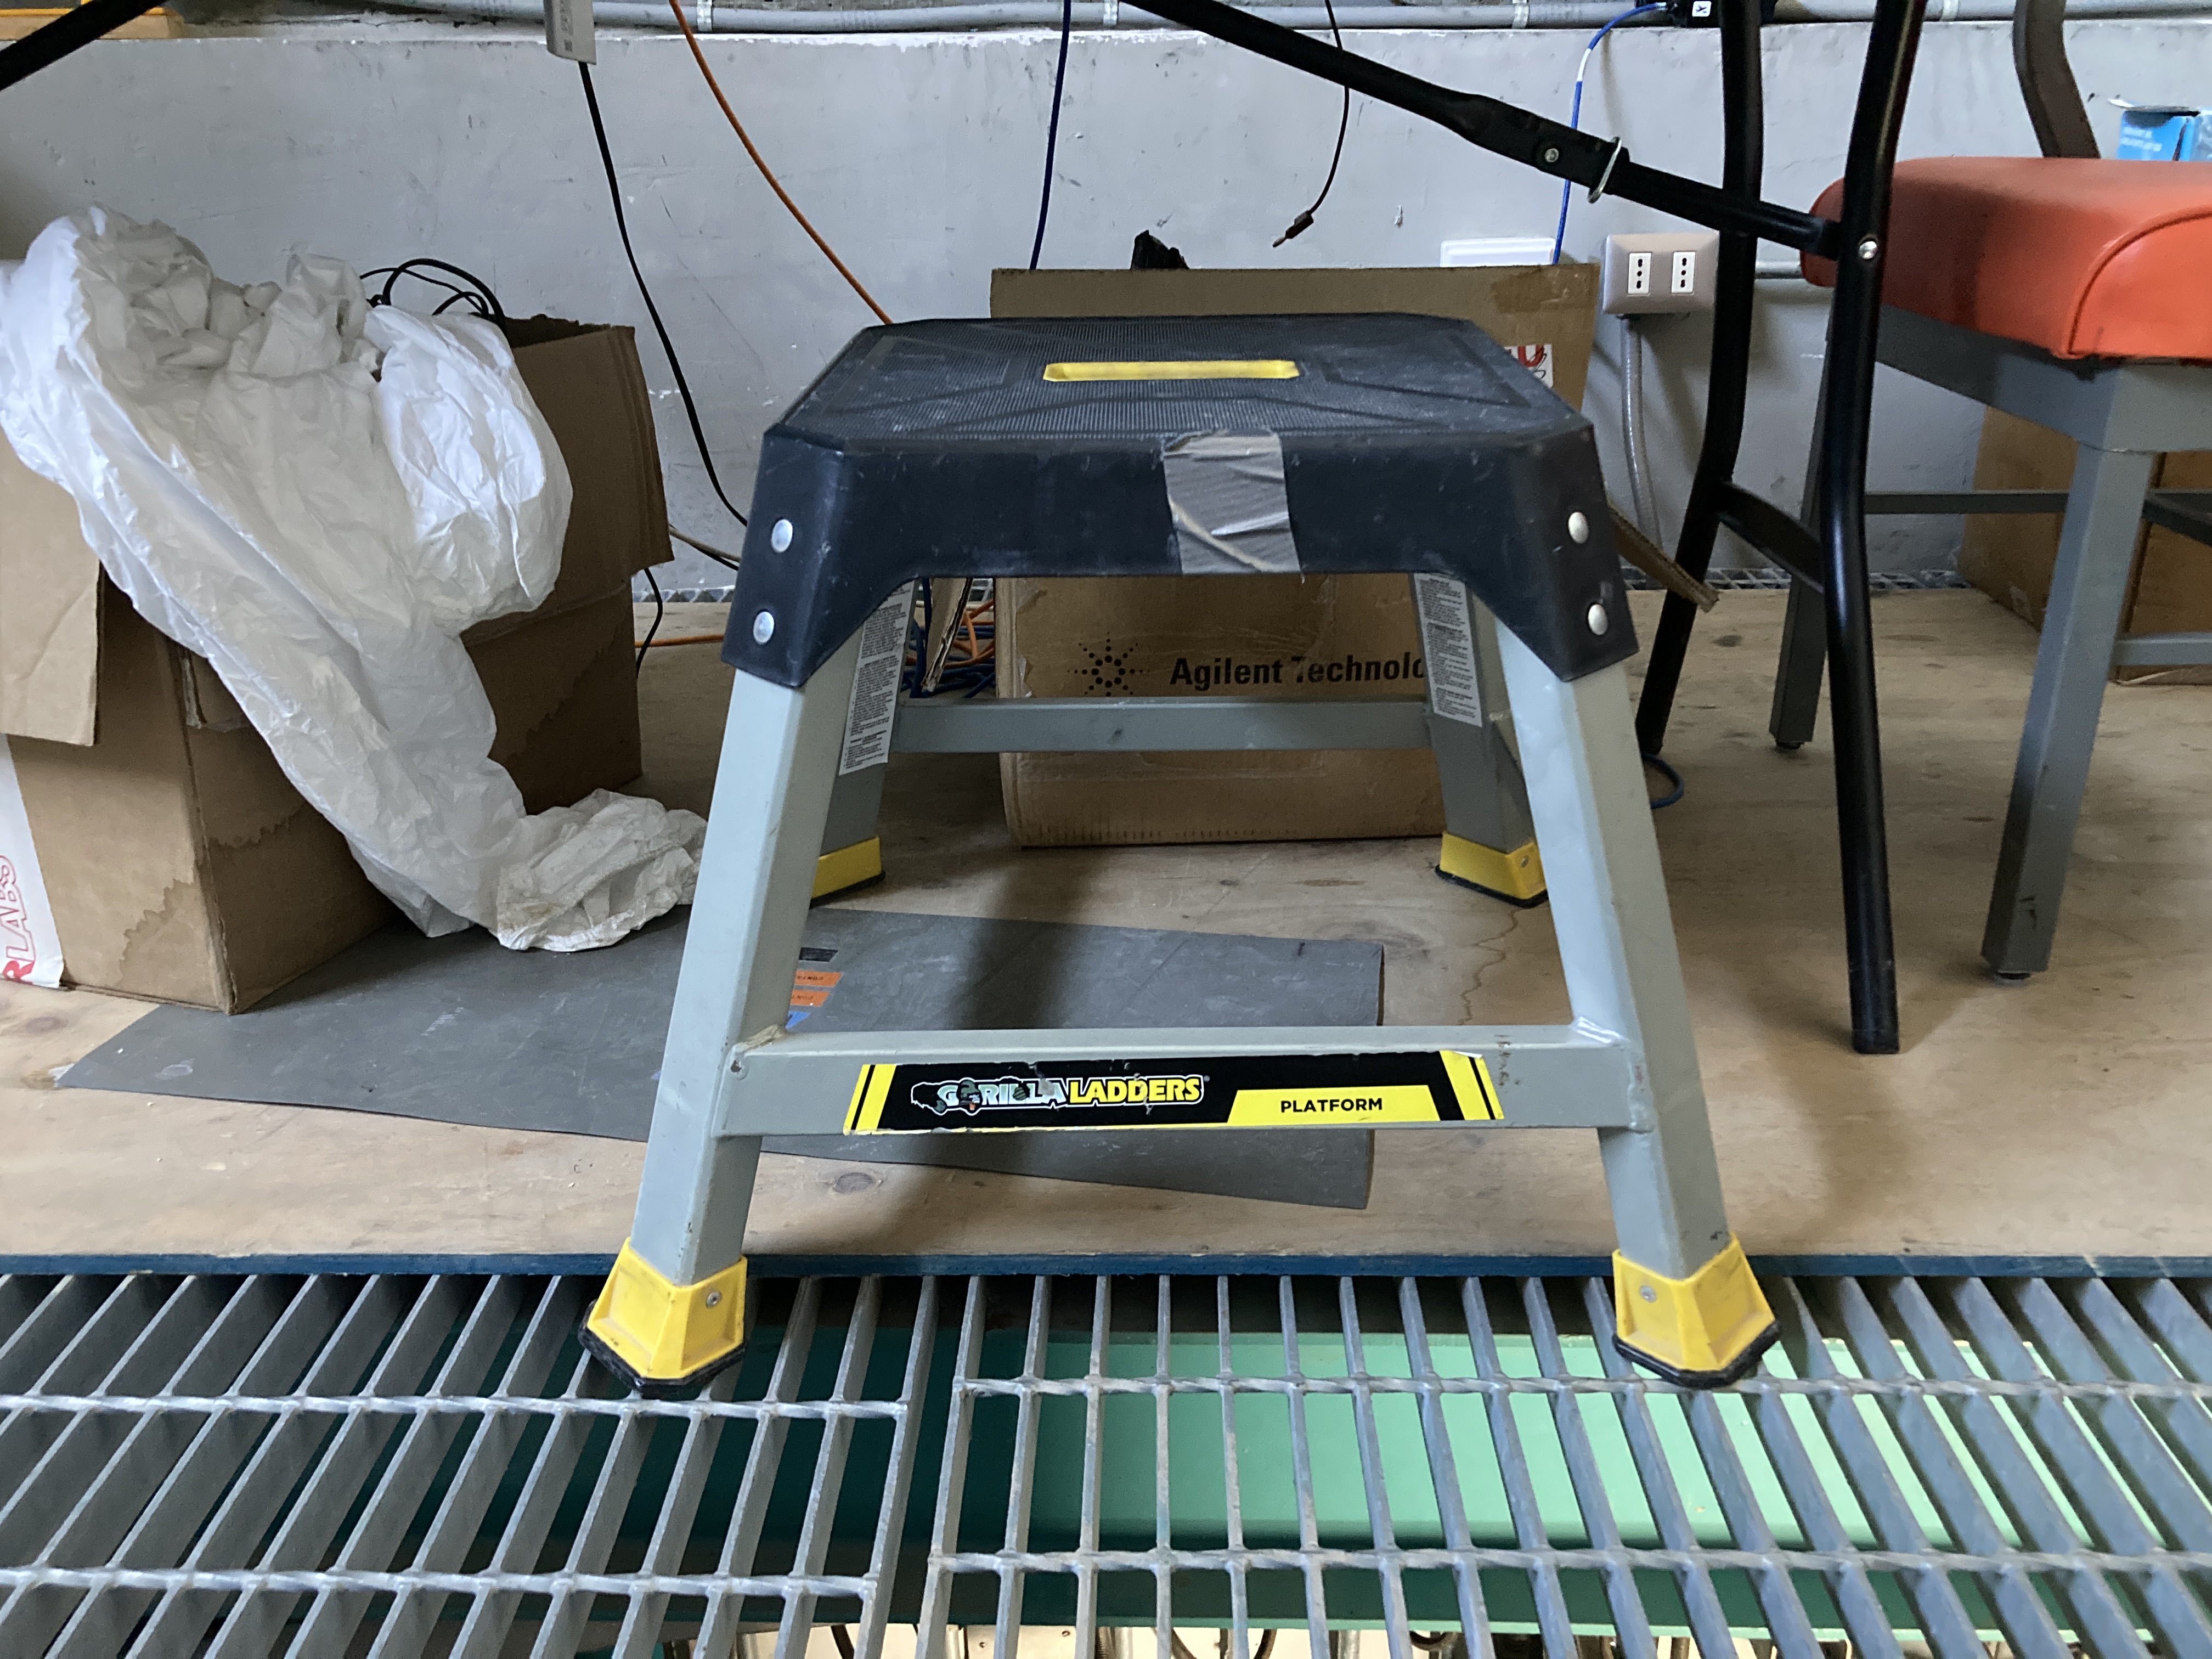
Figure 9: Step stool available in the second floor.
You can slide the eyepiece in and out to focus during observations. For this, use the two screws in the lower part of the tube (highlighted in red Figure 4). When loosened, they allow the entire tube to move, providing a greater focusing range.
Procedure - Ending Observations and Closure#
Execute the shutdown_all.py script in the LOVE ScriptQueue. This script will park the telescope and dome.
Once the telescope and dome are parked, and the corresponding CSCs are in
STANDBY, the eyepiece can be removed. While holding the eyepiece with one hand, loosen the two screws and carefully remove the eyepiece. Return the eyepiece to its box and store it inside the spare parts cabinet in the first floor of the AuxTel building.M3 manual positioning (two staff members are needed for this procedure): Do not forget to put the M3 back to LATISS, following the same procedure as in the previous section.
Go downstairs to the first floor.
Close the Safety Gate, and pull the black handle to the right to lock it.
Press the lock button. A click sound will be heard, engaging the lock.
In the AT Control Cabinet, press the Safety Gate Bypass button to activate the Safety Gate Interlock. The button will pop-out.
Close the door of the AuxTel building on your way out.
Post a message in the Slack channels summit-auxtel and summit-announce communicating that you are done with the eyepiece observations with AuxTel, and inform the Observing Specialist (OS) on-duty about it.
END OF THE PROCEDURE